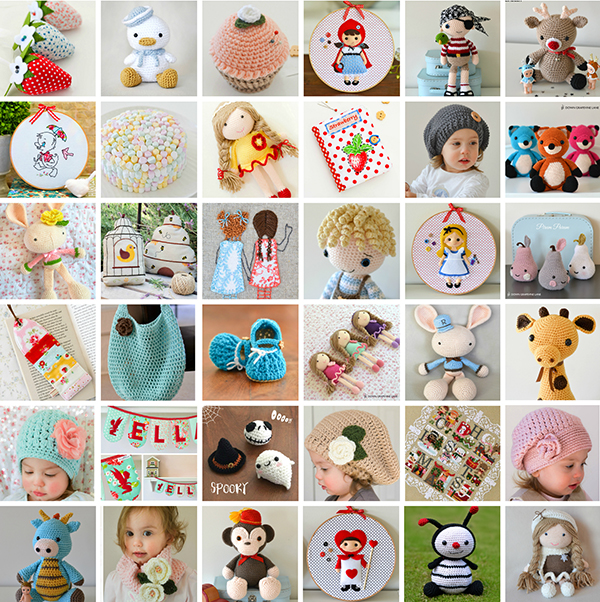
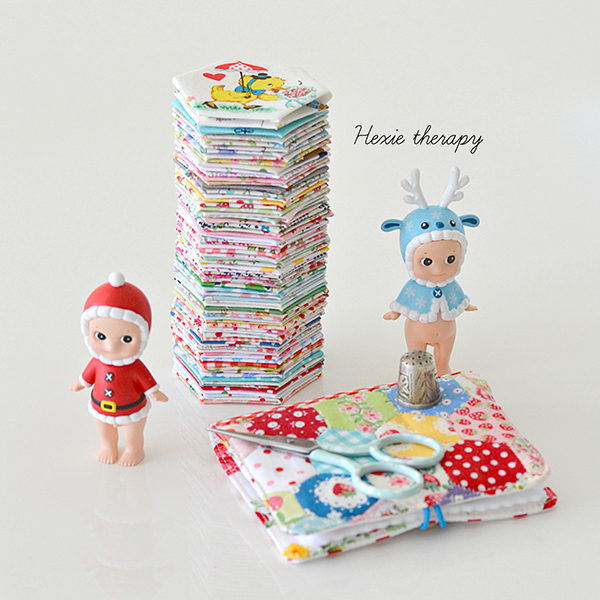
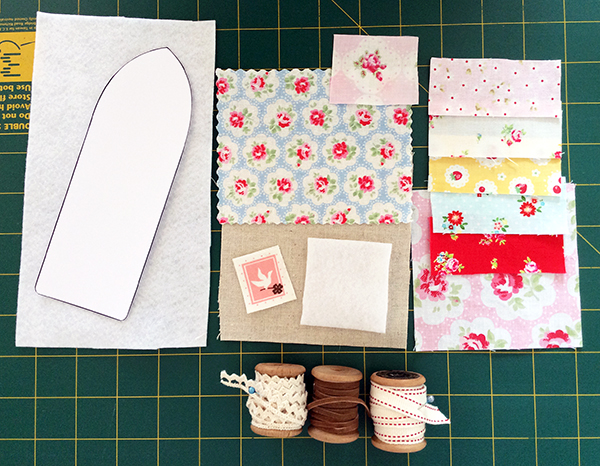
Tutorial: Zakka Bookmark

Here are the step by step instructions to make the scrappy bookmark I blogged about back in October. I still use it every day.


MATERIALS:
You will need:
- The pattern - download it from here as a PDF and print it to A4. I have provided the pattern for a rectangular bookmark as well as the curved shape I have used, pick one and cut it along the line.
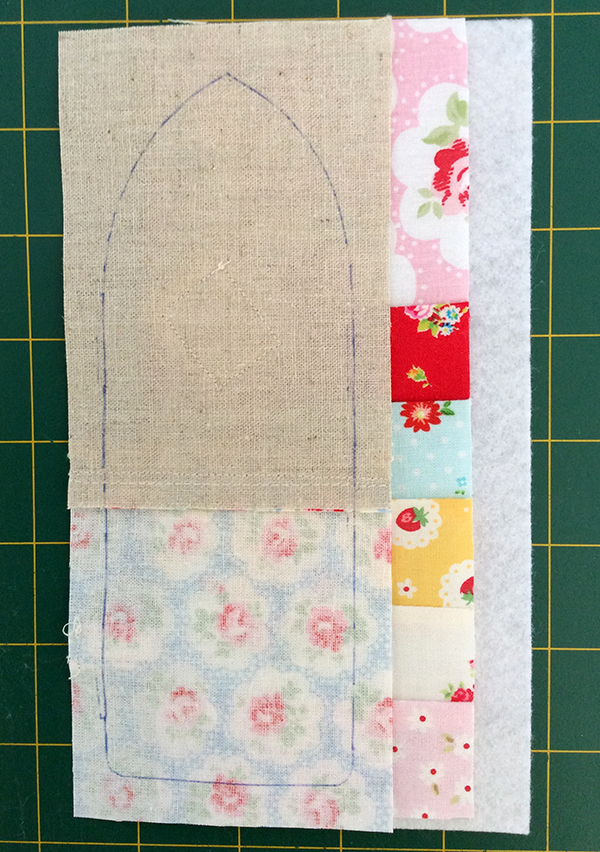
- 10 x 20cm piece of wadding or felt
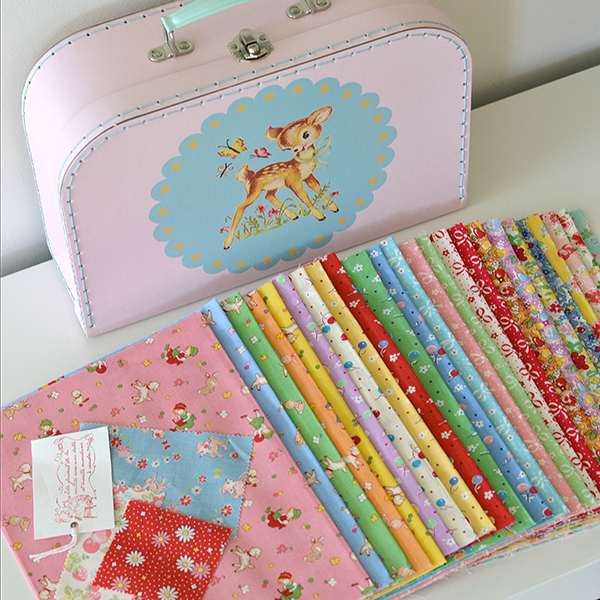
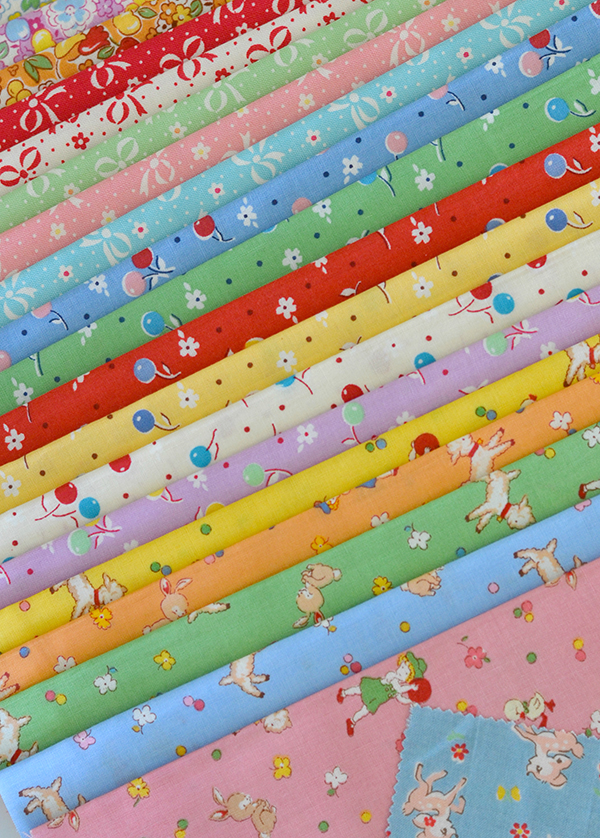
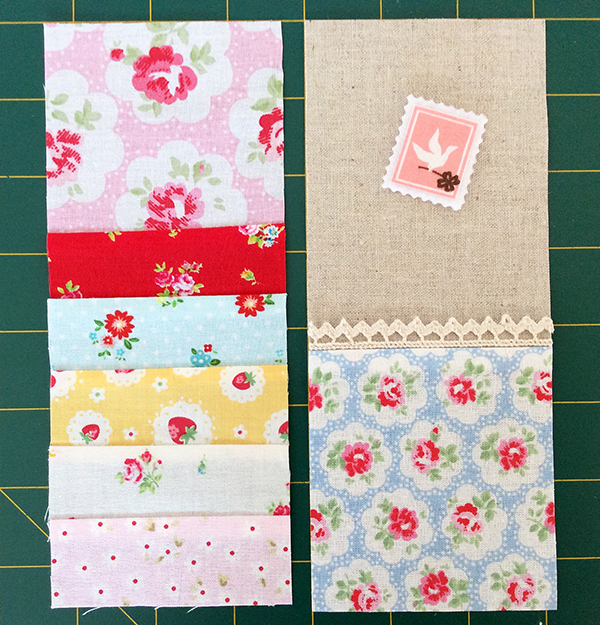
- Front patchwork: 8x9cm of floral fabric, 8x11cm of linen
- Back patchwork:  3.5 x 8cm strips of 5 different floral fabrics, and a 7x8cm of floral fabric for the top section
- Ball: A fabric circle of 5cm diameter and a small amount of filling material (polyfill or cotton wool)
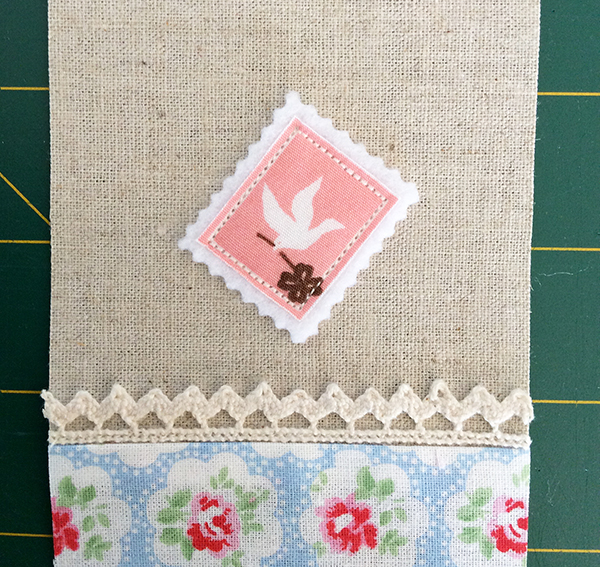
- Stamp patch: A fussy cut scrap of fabric, a piece of felt 1cm larger all around, and a piece of fusible web the same size as the stamp
- 6cm of crochet lace, 15cm of leather cord, 4cm of decorative ribbon for the tag, a small button
- An eyelet and an eyelet punch / pliers

IMG_0109 600pxbookmark
STEPS:

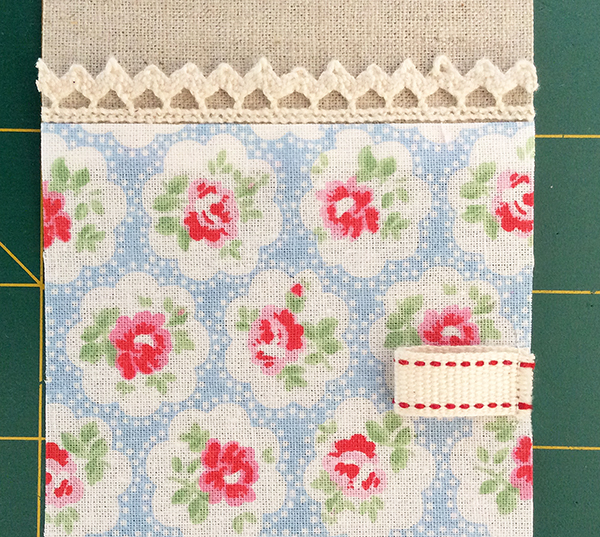
1. Using a 1/4 inch seam allowance sew the patchwork pieces together for the front and back of the bookmark. Sew the crochet lace just above the seam between the linen and floral fabric.

IMG_0118 600px

2. To make the stamp, fuse the piece of fabric onto a piece of fusible web using your iron (I used Heat'n Bond Lite) , trim the edges neatly, peel back the paper backing, and iron onto your piece of felt. Trim the edges of the stamp with pinking shears or scallop scissors as I have used here. Position on the linen and sew it on using a short stitch length.

IMG_0132 600px

3. For the ribbon tag, fold the ribbon up and sew on the edge as shown, going back and forth a few times.

IMG_0124 600px

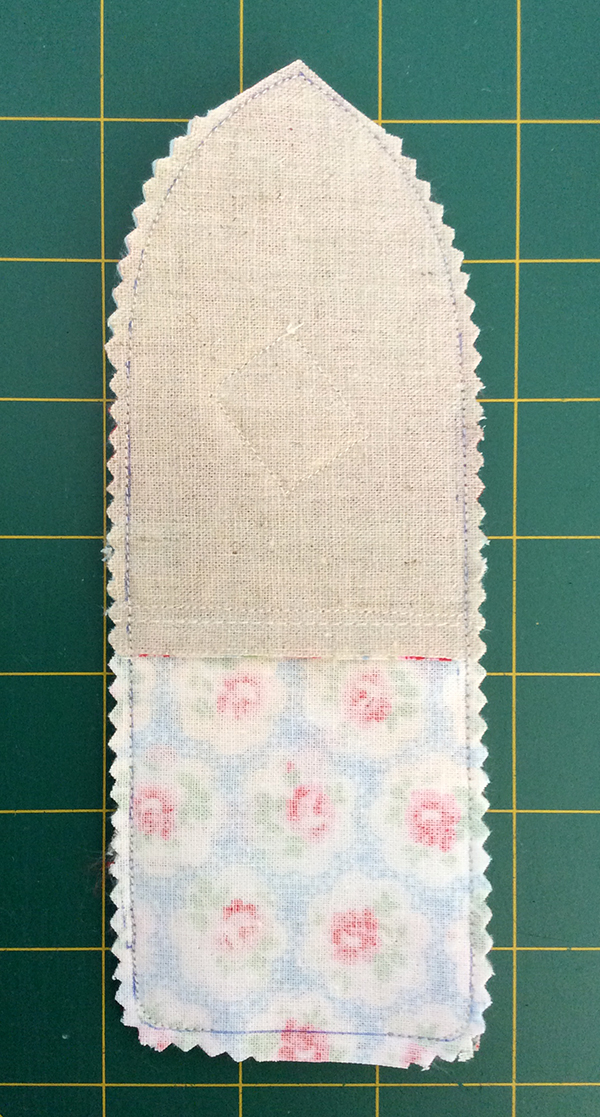
4. Trace the pattern on the back of your front patchwork. Then sandwich the layers, with the felt at the bottom, back patchwork next, front patchwork on top. Pin the layers together, and sew along the line making sure you leave a 3cm gap at the bottom to turn inside out.

IMG_0136 600pxIMG_0137 600px

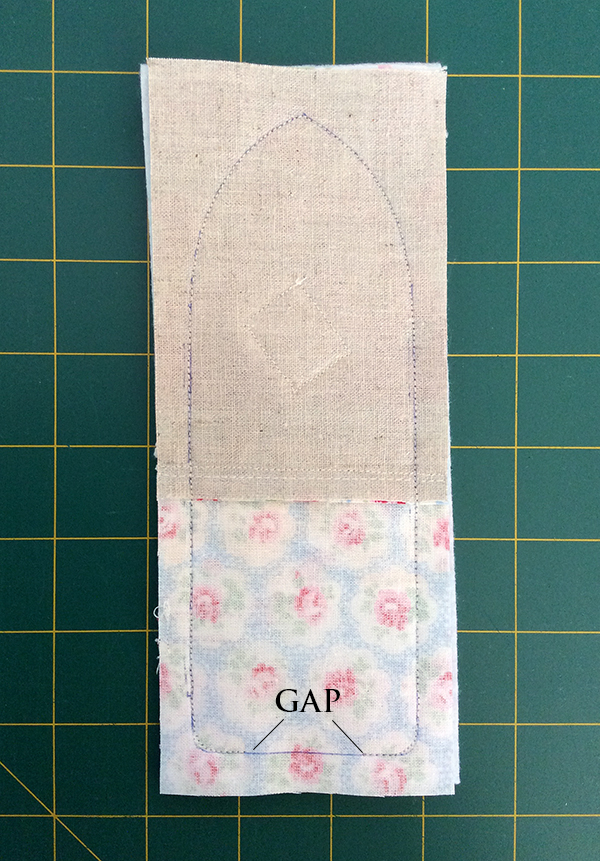
4. Trim away the excess fabric using your pinking shears (use ordinary scissors to cut quite near the seam at the pointy end as shown). Turn inside out through the gap at the bottom. You may need to insert something pointy to make sure the top point is as shown in the photos. Tuck in any excess fabric along the bottom into the gap neatly, and give the bookmark a quick iron before top stitching all the way around (which also closes the gap at the bottom).

 IMG_0139 600px

5. Punch an eyelet at the pointy end of the bookmark. Fold the leather cord in half, thread through the eyelet (folded end first), pull out a few cms, then thread the loose ends through the gap between the folded end of the cord and the eyelet, securing the cord in place. To make the ball, sew a running stitch all around the circle of fabric approximately 1/4 inch from the edge, tug the thread ends until the shape resembles a ball. Insert the loose ends of the leather cord inside the ball, then add some stuffing. Push the edges of the fabric inside the ball as neatly as you can, pull the thread ends more to form a gathered ball. Sew in place with a couple of stitches to secure . Sew a small button on the ribbon tag and your bookmark is ready!

DSC_0507-2

signature small

Foxes and dragons

Everyone has a soft spot for foxes, don't they? Especially when they look as cute as this little dude. His name is Chester, and oh, how my kids loved him.

DSC_0159 600pxFox collage 1 600pxDSC_0979 600px

He (she?) looks great in other colours too!

Fox collage 2 600pxDSC_0031 600px

And this little fellow here is Spike the Dragon. He looks rather dashing in blue as well as the traditional moss green.

DSC_0968 600pxDragon collage 600pxDragon collage green 600px

Both patterns are by Little Muggles and can be purchased here.

In other news, Alice's paper-pieced hexie doll quilt is progressing slowly, but surely. I have completed the quilt top and I am half way through the hand-quilting (yes, I like to make things rather difficult for myself. That's my idea of FUN.) It's been slow going both because hand-quilting is quite hard on the hands, but also because I had to take a few days' break from it to complete my fifth project for Homespun magazine. I wish  I could share some photos of THAT with you but I am not even allowed to give a sneak peek! Argh, it's killing me but I will just say this - it's a cracker! (wink wink)

DSC_0599 600px

I have a little obsession going on with Japanese repro 30s fabrics at the moment. Exhibit A - this bundle of Lecien & Yuwa yumminess I found on Etsy even though I am supposed to be on a fabric buying ban. Oh my goodness. I look at these and I can see some cute quilts and cushions screaming 'Make me! Make me!'. Lecien make it just SO easy.

DSC_0616 600pxDSC_06222 600px

signature small

Mr Giraffe

Here is one more creation from the last six months that I didn't get a chance to share sooner. Alexander named him 'Gerry'. He was rather taken by him as you can see!

DSC_0157giraffe collage 1

The pattern is by Djonesgirlz on Etsy and can be purchased here.

DSC_0187-2DSC_0178-2DSC_0175-2

He was made for a friend's daughter so I personalised it with her initial on one of the giraffe's feet.

giraffe collage 2

As for current projects, I have so many balls in the air right now it's quite a juggling act. I am preparing new products and stock for my Etsy shop's reopening on 30 January, working on my next project for Homespun magazine, restyling my blog, and making a hexie doll quilt for Alice.

DSC_04982

I have also spent several days cleaning and re-organising my sewing room (aka guest bedroom). It's all fresh and tidy for the new year. Mind you it didn't stay neat like this for very long, creativity and tidiness must be mutually exclusive, don't you think?

sewing room

signature small

Goodbye 2014

As another year draws to a close, I find myself getting reflective about the past year, the new year ahead, and work and life in general. 2014 was a good year, all in all. I probably never worked so hard in my life (and that's saying something considering I used to be a senior director at a big investment bank in London in my 'previous' life!). When you have pre-school age kids you tend to work when they are asleep, and with an Etsy shop to run as well as this blog, midnight sewing sessions became my 'normal'. But despite (and if I am honest, because of!) all this hard work 2014 was a fun and productive year for Down Grapevine Lane. I learned a lot about sewing, needlework, crochet, blogging, photography, and running an online shop. Here's a quick round up of my 'makes' from the past year (you may notice there are one or two things here I haven't had a chance to blog about yet!).

2014 collage

What better way to bid the old year goodbye with than this cute trio of festive animals. Meet Jingles the Reindeer, Pepe the Penguin (with his Santa hat), and Jolly the Snowman - all patterns by Little Muggles.

JinglesJollyPepe

You may have noticed the semi-naked babies keeping Jingles company - they are little dolls made by Sonny Angel in Japan and we are all nuts about them in this house. Alice in particular - she has a sheep 'babee' and she can't sleep without holding it in her palm. There are many different styles of Sonny Angels, ones with animal, fruit or cake hats, or limited edition dolls like this Christmas set. The Japanese sure know how to do 'cute'!

DSC_01452

These sweeties tend to hang around my sewing desk, keeping me company (at the moment whilst I am indulging in some hexie paper piecing therapy, making a doll quilt for Alice).

DSC_02942

Season's greetings and my warmest wishes for a new year filled with happiness, good health, and cherished memories!

DSC_04613

signature small

Christmas 2014

Christmas came around so quickly this year! It was October, then I blinked and it was Christmas Eve. This was Alexander's first 'proper' Christmas, last Christmas he had a wonderful time but didn't really 'get' Santa and what Christmas day was all about. So the lead up to the day was almost as exciting as the day itself. We made a gingerbread house together, and he wrote a letter to Santa telling him what he wanted - "Hello Santa. I want Lego. Alex." Brief and to the point (well, it has to be as he's learning to write). He placed it on the table with a mince pie and glass of cognac for Santa (catering to 'our' Santa's British tastes - wink wink). He also helped me to put up the decorations, including these two stockings I made for him and Alice.

DSC_05652DSC_0256DSC_0286

So without a further ado here is a random collection of snapshots from Christmas day at Down Grapevine Lane headquarters. Everyone loved their presents, though the turkey and trimmings lunch that I slaved over all morning was a bit of a flop with the children and they both insisted on having peanut butter sandwiches instead. Kids!!

collage3collage1collage4collage2

There were two Christmas miracles this year. I am actually in some of the photos, and I managed to pull off a 3 hour nap after lunch. Miracle indeed!

DSC_0128DSC_0127collage5

        (cutest Santa, who had to be bribed with a gingerbread man to pose for the photos)

Those of you who celebrate Christmas, hope you had a great one with your loved ones! Wishing everyone a merry christmas and a happy and healthy 2015.

DSC_05933

As for Christmas crafting - I have been working on the Christmas celebration sampler by The Frosted Pumpkin Stitchery. It's gorgeous! I can't wait to share the finished picture with you - I just need to find a frame for it.

DSC_05962

signature small

ShareThis